

Surviving Earth Changes, Where and how to find water, How to Pack a Backpack
Oct 27, ’08 3:11 AM
by Ann for everyone
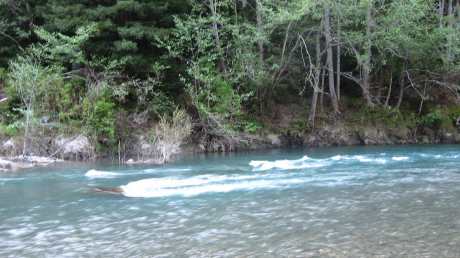
When you don’t have a beautiful clean lake or river to get your water from, where do you find water?How to make a solar still.
The solar still is a wilderness survival technique for gathering water in very dry locations, especially in the desert where finding water can be difficult. There are 2 essential components – a container to catch the water and a plastic sheet. A shovel or trowel wouldn’t hurt either..
The basic principle is that solar energy heats the soil in a hole by passing through a plastic sheet. Moisture from the soil then evaporates, causing condensation to form on the plastic. Make sure when you are selecting your site for your still you look for a sunny location.
Construction
Dig a hole about 1m (3 ft) wide and 0.5 m (2 ft) deep.
Place a collecting can at the bottom. Cover the hole with a plastic sheet formed into a cone and hold it in place with rocks.
Place a small rock onto its center so the lowest point of the plastic sheet is directly above the container.
The sun will raise the temperature of the air and soil in the hole, producing vapour. Moisture will condense on the underside of the plastic sheet and water will drop into the container. You need to open the still to drink the water that has been collected or alternative use some form of tubing.
The solar still only takes about an hour to build. If constructed correctly, it can yield about a litre (quart) of water a day.
Where and how to find waterThere are actually many ways you can learn how to find water, whether you are in a desert or forest. To increase your chances in finding water, look for the following:
Valleys and low areas are places where water naturally drains.
Rock crevices. Rainwater may have been collected.
Muddy or damp ground.
Patches of green vegetation. Indicates water of some sort.
Places where animal tracks converge – maybe a water source nearby?
Birds, as they will often circle a watering hole.
Insects, as they often stay close to water.
Collecting waterEven if you do not find surface water you can sustain yourself in a wilderness survival situation by collecting water from the atmosphere, or from plants or ground stills.Rain and dew Rainwater is usually safe for drinking and only needs collecting. More about rainwater harvesting.
You can collect morning dew by soaking a cloth in long, wet grass. When the cloth is soaked wring it out directly into your mouth or a container. Repeat.
Condensation
Tree and plants roots draw moisture from the ground. Use that fact to collect water without digging.
Tie a plastic bag over a growing branch with exposure to the sun. Being careful not to puncture the bag. Close the bag. Keep a corner hanging low to collect water. Evaporation from the leaves will produce condensation in the bag. This is an easy way to get pure drinkable water!
If you have problem how to find water and you are lucky enough to have a 6 x 6-footsheet (2×2 m) of clear plastic you can create a solar still.
Snow and ice
Don’t make the mistake to assume water is not important in cold winter conditions. Water is always important. Melt ice and snow to get survival water.
Pollution
First, rainwater is not free of pollution. Rainwater contains, for example; dust, plant parts, insect parts, bacteria, etc, that the rain has washed out of the air. As this was not enough rainwater also contain anthropogenic gases that result from industrial discharge, biomass and fossil fuel burning. Actually Mother Nature does use water as a way to clean the sky.
Rainwater in rural areas – away from atmospheric and industrial pollution – is fairly clean. So if you are collecting rainwater in the wilderness far away from polluted industrial areas you are in a better position to get cleaner rainwater.
Drinking rainwater
Normally you could drink rainwater without becoming ill. I have used the precipitation as a water supply backup many times on my wilderness trips and that has worked fine for me. The trick is that the rainwater must be carefully handled so that it does not become contaminated.
A lot of people have survived emergency situation by drinking rainwater. However, if you want to be on the safe side, purify your rainwater.It’s your decision. If you are equipped with a portable filter bottle, use it.
Comment: Rainwater miss some minerals compared to water out of the ground or from steams. You can probably taste the difference.
Rainwater harvesting
Make sure your water catchment system is clean. It might be a good idea not to collect the rain when it just starts as it’s washing out all the particulate material in the air .
Examples:
1)
Collect rainwater flowing off the roof of your tent or shelter. Simply lower one corner and direct the water into a collecting bowl or container. Make sure the tent or shelter roof is clean.
2)
A variation of the first example is to use a clean sheet of plastic. Put your sheet of plastic on sloping ground. Put stones on the plastic to make sure the wind will not catch it. Make a mini “V” shape trough down in which rain can flow.
Comment: On my wilderness trips I always have a clean large plastic trash bag in my backpack.
3)
The simplest alternative is to just set out rain collecting containers, anything that holds water. However, it has to rain heavily to fill it up.
Anyone could find themselves in an emergency situation and even the most basic survival knowledge could mean the difference between life and death. A basic understanding of survival techniques should enable anyone to travel through the wilderness with an increased level of confidence and enjoyment Be Prepared The best time to practice any wilderness survival skills – start a fire, shelter building or whatever – is before you need them. Take some time to read all the information contained in this website. You will learn how to take care of yourself and others when traveling in the wilderness, and I’m sure that your next excursion will provide you with a greater level of enjoyment due to your newfound knowledge.
Anyone could find themselves in an emergency situation and even the most basic survival knowledge could mean the difference between life and death. A basic understanding of survival techniques should enable anyone to travel through the wilderness with an increased level of confidence and enjoymentBe Prepared The best time to practice any wilderness survival skills – start a fire, shelter building or whatever – is before you need them. Take some time to read all the information contained in this website. You will learn how to take care of yourself and others when traveling in the wilderness, and I’m sure that your next excursion will provide you with a greater level of enjoyment due to your newfound knowledge.
FatwoodI bought a package of Fatwood (check Wikipedia for more info), shaved it, and poof, an instant fire! I was shocked at how well and how little I
Steel woolSteel wool is an excellent, hot-burning tinder for fire making that can allow for one match/spark/etc. lights. Even better, it can be lit in a variety
Oct 27, ’08 3:00 AM
by Ann for everyoneHow to Pack a Backpackhttp://www.youtube.com/watch?v=LubDBq-V_eA
Below are the top ten tips to help you learn how to pack a backpack the right way. Take my word for it, packing correctly can make all the difference in the world.
Do carry at least 2 quarts of water. Do not discard any food in natural areas–including fruit peels. Food:
Pack all food in one self-contained bag with some sort of strap that will make hanging it easy.
Pack all food in resealable plastic bags. Take food out of its shelf packaging before leaving home.
Use a cook stove for preparing hot food or drink- do not expect to cook over an open fire.
Carry out all uneaten food.
Easy food suggestions:
Breakfast:
Bagels
Muffins
Poptarts
Breakfast bars
Granola bars
Oatmeal
Fruit
Tea/Coffee/Hot Chocolate
Box Juice DrinksLunch:
Crackers and cheese
Peanut butter and Jelly
Pita bread
Bagels
Tuna
Fruit
Trail mix
Granola bars
Cookies
Box juice drinks
Candy -chocolateDinner:
Instant soup
Minute Rice
Stove-top stuffing
Canned chicken
Raman Noodles
Soup mixtures in cups
Canned stews
cookiesKeep it simple–food should be light and packable. Take out of store bought containers at home. Use Ziplock Freezer bags. Remember that there is limited good water for clean-up and you probably don’t want to spend the whole trip cooking and cleaning up. Stay hydrated and do eat for energy during the day and warmth at night.
This survival kit can be used for almost all enviorments. With this you will be able to survive a long time in the wilderness.
Steps
Tips
Warnings
Matches. (Use “Strike-anywhere” matches. Whatever you do, don’t use “Strike-on-box’ matches.” It is impossible to light “Strike-on-box” matches on anything other than the special striker strip on the box. If you don’t have the match box or if the box gets wet, you are in big trouble. Try it out for yourself, and you’ll be amazed. They simply won’t light on anything else. Be very careful when shopping for matches. It’s easy to get the two different types of matches mixed up at the store. The boxes look the same. Always double-check and make sure you buy the right matches. Once you’re sure that you have the right matches, place the matches in a waterproof case–small plastic waterproof match containers sold at sporting goods stores work fine–and include a striker. A piece of emery board makes a good striker. In very wet conditions, you’ll want to have a dry striker along with your matches. When you need a fire, you don’t want to mess around trying to light matches on wet rocks. Matches, which weigh nothing and easily fit in your pocket, are one of your most important survival tools. Not only does fire allow you to survive a cold, miserable night, but it is an important moral booster as well.
Fire Starter. (Always include fire starter with matches. Always. There are times when even the best woodsman or woodswoman will not be able to make a fire without it. Fire starter assures that you can get fire going quickly, no matter how bad the conditions. Place some fire starter in your pack, but also put a small chunk of fire starter along with your matches and a striker in a waterproof case. Carry the case in your pocket. Never put your waterproof match case in your pack. If you do and if for some reason, you get separated from your pack, you’re in trouble.)
Map. (Many people who have been rescued could have easily gotten themselves out of trouble by simply having a good map along.)
Compass. (Even if you carry a GPS device, you still need a compass. Although, GPS units provide a reasonably accurate fix of your location, they do not provide accurate bearings. If you know how to following a compass bearing, you can guide yourself out of thickly forested areas, featureless winter landscapes, foggy sagebrush areas, etc.)
Flashlight, Extra Batteries and Bulb. (A flashlight–or better yet, a headlight–is another one of those tools, like a map, that is simple and cheap insurance. Should night overtake you, it gives you the ability to find your way back to the trailhead.)
Extra Food. (Having extra food is critical in emergency situations. It helps ward off hypothermia in cold, wet weather, and it keeps you thinking clearly in a crisis.)
Extra Clothing. (Even if it’s a sunny day and you’re on a short day hike, you should carry at least a rain jacket. It keeps you dry and also serves as wind protection. A good hat (wool or pile) stocking hat is also high on the list of extra clothing since a large amount of body heat is lost through the head and neck area. When deciding what to take, stay away from cotton which is worthless when wet.)
Sunglasses. (Good sunglasses are particularly important when you are in snow country. Snow blindness can completely disable an individual.)
First Aid Kit. (Be prepared for emergencies. Carry basic first aid supplies such as sterile gauze and pads, bandaids, moleskin, etc.
Pocket Knife. (With a pocket knife–a multi purpose Swiss Army knife is ideal–you can make field repairs, shave branches to make kindling, punch holes to repair a tarp, cut nylon cord, etc.)
Other EssentialsHere’s some other important items that you’ll want to consider in addition to those listed above. Shelter. The Ten Essentials’ list has one glaring omission. It lacks the materials to build an emergency shelter. When all is considered, the best way of surviving wet or snowy nights is have some type of roof over your head and a dry floor under you. One of the best shelter options is a combination of a lightweight nylon poncho, nylon cord and a lightweight space blanket. The poncho can be tied to trees or placed over a rudimentary snow shelter to keep out wind and weather–and in a pinch it doubles as a rain jacket. Use a nylon poncho or tarp. Avoid plastic ponchos and tarps. They rip easily and become brittle in cold weather. For a dry floor underneath you, a lightweight space blanket is a good choice. They are inexpensive, light, and aren’t much larger than the size of a bar of soap. Since such lightweight space blankets, however, can tear easily, they are best used as a floor and not depended upon as a tarp over your head.
Desert Travel Considerations. Don’t forget one or more containers of water (an important item for any outdoor travel) and a piece of plastic for making a solar still.
Winter Travel Considerations. For winter travel, make sure you have adequate extra clothing. You’ll also want to carry enough repair supplies to be able to fix a broken snowshoe or ski. A headlight is doubly important in the winter since days are short and night comes quickly. It’s hard to get to water in the winter–lakes are frozen and streams are under a deep layer of snow–and you’ll need a metal cup to use for melting snow. A portable shovel is an important winter survival tool. With one you can dig snow caves or snow trenches in which you can survive a bitter, cold night. Moreover, in avalanche terrain, a shovel is a must. It is nearly impossible to dig someone out of an avalanche without a shovel. Lastly, in avalanche country, always carry an avalanche transceiver along with your shovel.
Walk-up Mountaineering. If you enjoy climbing mountains without using technical equipment, it is still good practice to carry at least 50 feet of lightweight rope for emergencies.
Lakes and Rivers. For water related activities, a life jacket is a must. Hypothermia is always a concern and you’ll want plenty of high energy food, rain gear and synthetic clothing. Carry a throw rope rather than a coiled rope. They are far easier to use and are less apt to get tangled. And, of course, no self respecting river rat ever leaves home without a roll of duct tape.
Safety Tips for Hurricane Storms & Disaster SurvivalHere are some safety and survival tips to keep in mind
during serious disaster causing storms.
Best policy is to plan ahead
and act sooner rather than later.
If one waits until the last minute, it can be
too late.
1. Put Aside Money.
Have some cash, and carry all your credit cards.
Also be sure to get a copy of your homeowner’s insurance policy, take
all valuable documents
with you when you evacuate or seek safety shelter.
2. Plan Your Escape Routes.
Have multiple escape routes and know the proper government evacuation
route.
Make sure you car’s fuel tank is filled and your mobile phone is
charged. Again, better to do this in advance
than wait until the last minute as fuel is often hard to get in areas
under immediate danger.
3. Plan Escape Trip.
Identify ahead of time where you could go if told to evacuate. Choose
several places,
like a friend’s home in another town, a motel or a shelter.
4. Prepare An Emergency Supply Kit.
Assemble a disaster supplies kit including the following items:
• First-aid kit and any essential medications.
• Canned food and can opener.
• At least three gallons of water per person.
• Protective clothing, rainwear and bedding or sleeping bags.
• Battery-powered radio, flashlight and extra batteries.
• Special items for infants, elderly or disabled family members.
• Written instructions on how to turn off electricity, gas and water
if authorities
advise you to do so. (Remember, you’ll need a professional to turn
them back on.)
5. Prepare Interiors Of Homes.
If evacuating, unplug all electrical devices. Shut off natural gas if
local officials advise it
and make sure to have a sufficient supply of batteries for
battery-powered equipment.
6. Prepare Exteriors Of Homes.
Secure your home by boarding over windows or putting up hurricane
shutters.
If you use boards, purchase precut one-half-inch outdoor plywood boards
for each window
of your home. Install anchors for the plywood and drill holes in the
plywood ahead of time,
so it can be installed quickly.
7. Clear Dead Trees Around Your Home & Property.
If you live in a wooded area, make trees more wind-resistant by taking
out diseased and
damaged limbs, then strategically removing branches so that wind can
blow through.
8. Avoid Highest Danger Areas.
Move to safe shelters. Low-lying areas and mobile homes should be
evacuated.
Low Lying areas will flood, cutting off escape routes and emergency
help also.
Mobile Homes can not withstand high winds and flooding. If you live in
a mobile home, evacuate
and seek high ground and safe shelters.
9. Keep Informed.
Stay informed by monitoring weather advisories on radio and television.
If advised to evacuate, do so immediately. Don not play hero or
stupidly ignore safety advisories,
most deaths from tropical storms & hurricanes are incurred by such
people.
10. Clean Up & Prepare Your Home’s Yard & Property.
If a hurricane watch is issued, prepare to bring inside any lawn
furniture, outdoor decorations or
ornaments, trash cans, hanging plants and anything else that can be
picked up by the wind. In a strong
hurricane’s winds, any object can become a flying and deadly object and
can cause incredible amounts
of damage to even strong structures.
Always think safety first, above all else.
Thank you, R
Tags: backpacks, Earth Changes, Survival
Posted by Little Running Deer clean water, Survival Subscribe to RSS feed | Edit4 Comments on Surviving Earth Changes, Where and how to find water, How to Pack a Backpack
Oct 27, ’08 3:11 AM
by Ann for everyone
When you don’t have a beautiful clean lake or river to get your water from, where do you find water?How to make a solar still.
The solar still is a wilderness survival technique for gathering water in very dry locations, especially in the desert where finding water can be difficult. There are 2 essential components – a container to catch the water and a plastic sheet. A shovel or trowel wouldn’t hurt either..
The basic principle is that solar energy heats the soil in a hole by passing through a plastic sheet. Moisture from the soil then evaporates, causing condensation to form on the plastic. Make sure when you are selecting your site for your still you look for a sunny location.
Construction
Dig a hole about 1m (3 ft) wide and 0.5 m (2 ft) deep.
Place a collecting can at the bottom. Cover the hole with a plastic sheet formed into a cone and hold it in place with rocks.
Place a small rock onto its center so the lowest point of the plastic sheet is directly above the container.
The sun will raise the temperature of the air and soil in the hole, producing vapour. Moisture will condense on the underside of the plastic sheet and water will drop into the container. You need to open the still to drink the water that has been collected or alternative use some form of tubing.
The solar still only takes about an hour to build. If constructed correctly, it can yield about a litre (quart) of water a day.
Where and how to find waterThere are actually many ways you can learn how to find water, whether you are in a desert or forest. To increase your chances in finding water, look for the following:
Valleys and low areas are places where water naturally drains.
Rock crevices. Rainwater may have been collected.
Muddy or damp ground.
Patches of green vegetation. Indicates water of some sort.
Places where animal tracks converge – maybe a water source nearby?
Birds, as they will often circle a watering hole.
Insects, as they often stay close to water.
Collecting waterEven if you do not find surface water you can sustain yourself in a wilderness survival situation by collecting water from the atmosphere, or from plants or ground stills.Rain and dew Rainwater is usually safe for drinking and only needs collecting. More about rainwater harvesting.
You can collect morning dew by soaking a cloth in long, wet grass. When the cloth is soaked wring it out directly into your mouth or a container. Repeat.
Condensation
Tree and plants roots draw moisture from the ground. Use that fact to collect water without digging.
Tie a plastic bag over a growing branch with exposure to the sun. Being careful not to puncture the bag. Close the bag. Keep a corner hanging low to collect water. Evaporation from the leaves will produce condensation in the bag. This is an easy way to get pure drinkable water!
If you have problem how to find water and you are lucky enough to have a 6 x 6-footsheet (2×2 m) of clear plastic you can create a solar still.
Snow and ice
Don’t make the mistake to assume water is not important in cold winter conditions. Water is always important. Melt ice and snow to get survival water.
Pollution
First, rainwater is not free of pollution. Rainwater contains, for example; dust, plant parts, insect parts, bacteria, etc, that the rain has washed out of the air. As this was not enough rainwater also contain anthropogenic gases that result from industrial discharge, biomass and fossil fuel burning. Actually Mother Nature does use water as a way to clean the sky.
Rainwater in rural areas – away from atmospheric and industrial pollution – is fairly clean. So if you are collecting rainwater in the wilderness far away from polluted industrial areas you are in a better position to get cleaner rainwater.
Drinking rainwater
Normally you could drink rainwater without becoming ill. I have used the precipitation as a water supply backup many times on my wilderness trips and that has worked fine for me. The trick is that the rainwater must be carefully handled so that it does not become contaminated.
A lot of people have survived emergency situation by drinking rainwater. However, if you want to be on the safe side, purify your rainwater.It’s your decision. If you are equipped with a portable filter bottle, use it.
Comment: Rainwater miss some minerals compared to water out of the ground or from steams. You can probably taste the difference.
Rainwater harvesting
Make sure your water catchment system is clean. It might be a good idea not to collect the rain when it just starts as it’s washing out all the particulate material in the air .
Examples:
1)
Collect rainwater flowing off the roof of your tent or shelter. Simply lower one corner and direct the water into a collecting bowl or container. Make sure the tent or shelter roof is clean.
2)
A variation of the first example is to use a clean sheet of plastic. Put your sheet of plastic on sloping ground. Put stones on the plastic to make sure the wind will not catch it. Make a mini “V” shape trough down in which rain can flow.
Comment: On my wilderness trips I always have a clean large plastic trash bag in my backpack.
3)
The simplest alternative is to just set out rain collecting containers, anything that holds water. However, it has to rain heavily to fill it up.
Anyone could find themselves in an emergency situation and even the most basic survival knowledge could mean the difference between life and death. A basic understanding of survival techniques should enable anyone to travel through the wilderness with an increased level of confidence and enjoyment Be Prepared The best time to practice any wilderness survival skills – start a fire, shelter building or whatever – is before you need them. Take some time to read all the information contained in this website. You will learn how to take care of yourself and others when traveling in the wilderness, and I’m sure that your next excursion will provide you with a greater level of enjoyment due to your newfound knowledge.
Anyone could find themselves in an emergency situation and even the most basic survival knowledge could mean the difference between life and death. A basic understanding of survival techniques should enable anyone to travel through the wilderness with an increased level of confidence and enjoymentBe Prepared The best time to practice any wilderness survival skills – start a fire, shelter building or whatever – is before you need them. Take some time to read all the information contained in this website. You will learn how to take care of yourself and others when traveling in the wilderness, and I’m sure that your next excursion will provide you with a greater level of enjoyment due to your newfound knowledge.
FatwoodI bought a package of Fatwood (check Wikipedia for more info), shaved it, and poof, an instant fire! I was shocked at how well and how little I
Steel woolSteel wool is an excellent, hot-burning tinder for fire making that can allow for one match/spark/etc. lights. Even better, it can be lit in a variety
Oct 27, ’08 3:00 AM
by Ann for everyoneHow to Pack a Backpackhttp://www.youtube.com/watch?v=LubDBq-V_eA
Below are the top ten tips to help you learn how to pack a backpack the right way. Take my word for it, packing correctly can make all the difference in the world.
- Whether you have a Down Sleeping Bag or a Synthetic Sleeping Bag, it should go into a stuff sack lined with a garbage bag (To keep it dry) or a waterproof stuff sack. It should then go into the bottom of your backpack since it is one of the last items you will need during the day.
- Heavy and dense items, such as food, should be kept in the middle of the pack and as close to your back as possible. This helps maintain good balance.
- Items that you may need in a hurry should be at the top of your pack. For example, first aid kits and rain gear should always be handy.
- Other items that will be frequently used should also go near the top of your pack. For example: map, compass, snacks, sunscreen, a warm layer, camera, iodine tablets, etc.
- Keep your food above the fuel bottles in case there is a leak. (Trust me, you don’t want to eat fuel-soaked food)
- Break down larger items into smaller parts. For example, pack the tent body, the fly, and the poles all separately rather than in one large sack. This will let you use up more of the “dead” space in your pack, which leads us to the next tip.
- Stuff the tent body and tent fly into the empty spaces that are left in between other items in your pack. The best way to do this is to simply start with one corner of the fly or tent and start cramming it into the bottom of the pack where there is a lot of empty space.
- Leave no dead space. Fill containers such as cook pots, bowls, and mugs with food or spare clothing. For protection and to save room it is a good idea to pack your stove into your cook pot if it will fit.
- For internal packs, try to keep everything inside the pack. You will have a more balanced pack. Things are less likely to come up missing, and it just looks better.
- Tighten your pack’s compression straps to make the load more balanced and compact.
Do carry at least 2 quarts of water. Do not discard any food in natural areas–including fruit peels. Food:
Pack all food in one self-contained bag with some sort of strap that will make hanging it easy.
Pack all food in resealable plastic bags. Take food out of its shelf packaging before leaving home.
Use a cook stove for preparing hot food or drink- do not expect to cook over an open fire.
Carry out all uneaten food.
Easy food suggestions:
Breakfast:
Bagels
Muffins
Poptarts
Breakfast bars
Granola bars
Oatmeal
Fruit
Tea/Coffee/Hot Chocolate
Box Juice DrinksLunch:
Crackers and cheese
Peanut butter and Jelly
Pita bread
Bagels
Tuna
Fruit
Trail mix
Granola bars
Cookies
Box juice drinks
Candy -chocolateDinner:
Instant soup
Minute Rice
Stove-top stuffing
Canned chicken
Raman Noodles
Soup mixtures in cups
Canned stews
cookiesKeep it simple–food should be light and packable. Take out of store bought containers at home. Use Ziplock Freezer bags. Remember that there is limited good water for clean-up and you probably don’t want to spend the whole trip cooking and cleaning up. Stay hydrated and do eat for energy during the day and warmth at night.
This survival kit can be used for almost all enviorments. With this you will be able to survive a long time in the wilderness.
Steps
- First find a backpack or fanny pack.
- Carefully pack the following basic items:
- Reliable compass
- 30 ft coil of parachute cord
- 2 waterproof match holders with strike ANYWHERE matches
- “Trail” or “Backpacker” first aid kit
- Rain poncho
- Large Plastic Bag
- Signal mirror
- Loud whistle
- Flint and Steel Kit with attached Magnesium block
- Reliable, sharp folding pocket knife
- A two-person or 3 single-person Mylar emergency blankets (space blankets)
- Water bottle
- Water purification tablets
- Tinder kit of fine wood shavings, dryer lint, or fuel soaked tinder
- Pack additional items as you see fit. Here are some suggestions:
- Glowstick
- Candle
- A small pot
- Tin foil
- A bandanna
- A small fishing kit. In the fishing kit you should have 3-5 small hooks, 5 split shot weights and 20ft of line.
- Small backpacking stove and can of fuel
- Wire
- Duct tape
- Bug Spray
- Sunscreen
- Lip Balm
- Food items to include:
- Protein Bars
- Tea – many herbal teas have useful effects in a survival situation
- Gum
Tips
- ALWAYS take your survival pack with you, even if you are going on “just a short hike up the canyon”. Many people have run into trouble on short trips.
- If you are buying a backpack also, it is advisable to buy a pack with a detachable day pack (usually a fanny pack), and make this your survival pack. Then when you leave camp for any reason you can leave your big pack behind and just take the small survival pack.
- When deciding what to pack, try to make the survival pack complement what you usually put in your big backpack. i.e. if you have bug spray in your survival pack then you don’t need it in your big pack.
- To save pack space or to carry more rope, replace your boot laces with para-cord.
Warnings
- If you don’t know how to use the stuff in your kit, it won’t do you ANY good; so practice-practice-practice!
Matches. (Use “Strike-anywhere” matches. Whatever you do, don’t use “Strike-on-box’ matches.” It is impossible to light “Strike-on-box” matches on anything other than the special striker strip on the box. If you don’t have the match box or if the box gets wet, you are in big trouble. Try it out for yourself, and you’ll be amazed. They simply won’t light on anything else. Be very careful when shopping for matches. It’s easy to get the two different types of matches mixed up at the store. The boxes look the same. Always double-check and make sure you buy the right matches. Once you’re sure that you have the right matches, place the matches in a waterproof case–small plastic waterproof match containers sold at sporting goods stores work fine–and include a striker. A piece of emery board makes a good striker. In very wet conditions, you’ll want to have a dry striker along with your matches. When you need a fire, you don’t want to mess around trying to light matches on wet rocks. Matches, which weigh nothing and easily fit in your pocket, are one of your most important survival tools. Not only does fire allow you to survive a cold, miserable night, but it is an important moral booster as well.
Fire Starter. (Always include fire starter with matches. Always. There are times when even the best woodsman or woodswoman will not be able to make a fire without it. Fire starter assures that you can get fire going quickly, no matter how bad the conditions. Place some fire starter in your pack, but also put a small chunk of fire starter along with your matches and a striker in a waterproof case. Carry the case in your pocket. Never put your waterproof match case in your pack. If you do and if for some reason, you get separated from your pack, you’re in trouble.)
Map. (Many people who have been rescued could have easily gotten themselves out of trouble by simply having a good map along.)
Compass. (Even if you carry a GPS device, you still need a compass. Although, GPS units provide a reasonably accurate fix of your location, they do not provide accurate bearings. If you know how to following a compass bearing, you can guide yourself out of thickly forested areas, featureless winter landscapes, foggy sagebrush areas, etc.)
Flashlight, Extra Batteries and Bulb. (A flashlight–or better yet, a headlight–is another one of those tools, like a map, that is simple and cheap insurance. Should night overtake you, it gives you the ability to find your way back to the trailhead.)
Extra Food. (Having extra food is critical in emergency situations. It helps ward off hypothermia in cold, wet weather, and it keeps you thinking clearly in a crisis.)
Extra Clothing. (Even if it’s a sunny day and you’re on a short day hike, you should carry at least a rain jacket. It keeps you dry and also serves as wind protection. A good hat (wool or pile) stocking hat is also high on the list of extra clothing since a large amount of body heat is lost through the head and neck area. When deciding what to take, stay away from cotton which is worthless when wet.)
Sunglasses. (Good sunglasses are particularly important when you are in snow country. Snow blindness can completely disable an individual.)
First Aid Kit. (Be prepared for emergencies. Carry basic first aid supplies such as sterile gauze and pads, bandaids, moleskin, etc.
Pocket Knife. (With a pocket knife–a multi purpose Swiss Army knife is ideal–you can make field repairs, shave branches to make kindling, punch holes to repair a tarp, cut nylon cord, etc.)
Other EssentialsHere’s some other important items that you’ll want to consider in addition to those listed above. Shelter. The Ten Essentials’ list has one glaring omission. It lacks the materials to build an emergency shelter. When all is considered, the best way of surviving wet or snowy nights is have some type of roof over your head and a dry floor under you. One of the best shelter options is a combination of a lightweight nylon poncho, nylon cord and a lightweight space blanket. The poncho can be tied to trees or placed over a rudimentary snow shelter to keep out wind and weather–and in a pinch it doubles as a rain jacket. Use a nylon poncho or tarp. Avoid plastic ponchos and tarps. They rip easily and become brittle in cold weather. For a dry floor underneath you, a lightweight space blanket is a good choice. They are inexpensive, light, and aren’t much larger than the size of a bar of soap. Since such lightweight space blankets, however, can tear easily, they are best used as a floor and not depended upon as a tarp over your head.
Desert Travel Considerations. Don’t forget one or more containers of water (an important item for any outdoor travel) and a piece of plastic for making a solar still.
Winter Travel Considerations. For winter travel, make sure you have adequate extra clothing. You’ll also want to carry enough repair supplies to be able to fix a broken snowshoe or ski. A headlight is doubly important in the winter since days are short and night comes quickly. It’s hard to get to water in the winter–lakes are frozen and streams are under a deep layer of snow–and you’ll need a metal cup to use for melting snow. A portable shovel is an important winter survival tool. With one you can dig snow caves or snow trenches in which you can survive a bitter, cold night. Moreover, in avalanche terrain, a shovel is a must. It is nearly impossible to dig someone out of an avalanche without a shovel. Lastly, in avalanche country, always carry an avalanche transceiver along with your shovel.
Walk-up Mountaineering. If you enjoy climbing mountains without using technical equipment, it is still good practice to carry at least 50 feet of lightweight rope for emergencies.
Lakes and Rivers. For water related activities, a life jacket is a must. Hypothermia is always a concern and you’ll want plenty of high energy food, rain gear and synthetic clothing. Carry a throw rope rather than a coiled rope. They are far easier to use and are less apt to get tangled. And, of course, no self respecting river rat ever leaves home without a roll of duct tape.
Safety Tips for Hurricane Storms & Disaster SurvivalHere are some safety and survival tips to keep in mind
during serious disaster causing storms.
Best policy is to plan ahead
and act sooner rather than later.
If one waits until the last minute, it can be
too late.
1. Put Aside Money.
Have some cash, and carry all your credit cards.
Also be sure to get a copy of your homeowner’s insurance policy, take
all valuable documents
with you when you evacuate or seek safety shelter.
2. Plan Your Escape Routes.
Have multiple escape routes and know the proper government evacuation
route.
Make sure you car’s fuel tank is filled and your mobile phone is
charged. Again, better to do this in advance
than wait until the last minute as fuel is often hard to get in areas
under immediate danger.
3. Plan Escape Trip.
Identify ahead of time where you could go if told to evacuate. Choose
several places,
like a friend’s home in another town, a motel or a shelter.
4. Prepare An Emergency Supply Kit.
Assemble a disaster supplies kit including the following items:
• First-aid kit and any essential medications.
• Canned food and can opener.
• At least three gallons of water per person.
• Protective clothing, rainwear and bedding or sleeping bags.
• Battery-powered radio, flashlight and extra batteries.
• Special items for infants, elderly or disabled family members.
• Written instructions on how to turn off electricity, gas and water
if authorities
advise you to do so. (Remember, you’ll need a professional to turn
them back on.)
5. Prepare Interiors Of Homes.
If evacuating, unplug all electrical devices. Shut off natural gas if
local officials advise it
and make sure to have a sufficient supply of batteries for
battery-powered equipment.
6. Prepare Exteriors Of Homes.
Secure your home by boarding over windows or putting up hurricane
shutters.
If you use boards, purchase precut one-half-inch outdoor plywood boards
for each window
of your home. Install anchors for the plywood and drill holes in the
plywood ahead of time,
so it can be installed quickly.
7. Clear Dead Trees Around Your Home & Property.
If you live in a wooded area, make trees more wind-resistant by taking
out diseased and
damaged limbs, then strategically removing branches so that wind can
blow through.
8. Avoid Highest Danger Areas.
Move to safe shelters. Low-lying areas and mobile homes should be
evacuated.
Low Lying areas will flood, cutting off escape routes and emergency
help also.
Mobile Homes can not withstand high winds and flooding. If you live in
a mobile home, evacuate
and seek high ground and safe shelters.
9. Keep Informed.
Stay informed by monitoring weather advisories on radio and television.
If advised to evacuate, do so immediately. Don not play hero or
stupidly ignore safety advisories,
most deaths from tropical storms & hurricanes are incurred by such
people.
10. Clean Up & Prepare Your Home’s Yard & Property.
If a hurricane watch is issued, prepare to bring inside any lawn
furniture, outdoor decorations or
ornaments, trash cans, hanging plants and anything else that can be
picked up by the wind. In a strong
hurricane’s winds, any object can become a flying and deadly object and
can cause incredible amounts
of damage to even strong structures.
Always think safety first, above all else.
Thank you, R
Tags: backpacks, Earth Changes, Survival
Posted by Little Running Deer clean water, Survival Subscribe to RSS feed | Edit4 Comments on Surviving Earth Changes, Where and how to find water, How to Pack a Backpack
- Little Running Deer says:
August 20, 2015 at 1:52 pm (Edit)We now know because of the heavy metals and other poisons in Chemtrails, the rain water is not safe to drink! Even pollutes the ground water ! So everything needs to be filtered to be on the safe side! Clearly Filter works! - Little Running Deer says:
August 20, 2015 at 11:01 am (Edit)Warning Mold has been found in some small Juice Drinks Boxes ! Always a good rule? Better safe then sorry! - Little Running Deer says:
August 6, 2015 at 5:58 am (Edit)Readers comment:
“we came across a cool web-site that you just may well get pleasure from. Take a appear when …” - Ann LRD says:
February 22, 2011 at 7:46 am (Edit)http://littlerunningdeer.wordp.....g-fishing/


 RSS Feed
